
Halloween is this friday!
I’ll be at an “all you can eat risotto” with friends, but this doesn’t mean I won’t leave something around the house!
So I decided to be super-lame and join two trends I’ve seen going around for quite a while now: skull glass bottles and blackboard paint anything.
Which is exactly what you’ll need:
– glass skull bottle
– blackboard paint
– brushes (possibly one sponge brush, but if you don’t have one you can also cut a piece of your dish sponge… clean, of course!)
– newspaper to protect your working surface
– chalks to have fun with (otherwise what’s the point of blackboard paint???)
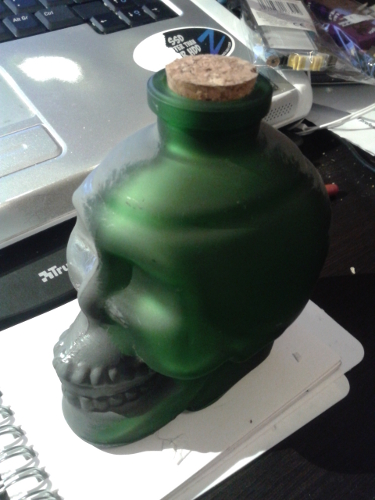
I was actually looking for a transparent glass bottle (who knows, maybe next summer I’ll be wanting to make some limoncello and can you imagine how cool it would be to serve it from a skull???) but couldn’t find any.
I had to compromise with a home-decore glass bottle (aka by by liquor poured from a crystal skull), in a not so thrilling satin green.
But since it costed so little (like, a couple of euros, yay for very cheap stores!) I decided to get one anyway, trusting that sooner or later my creativity would wake up…
Some days after, the lighting struck: I can’t make this transparent so… black would be better… or if I could write on it, that would be even… eeeehy! Blackboard paint!
Since my bottle was satin the paint gripped on quite easily, if yours is smooth glass, or plastic or any material where paint doesn’t stick easily, you might want to consider using a primer.
Or, being very patient, doing three to four layers of paint, instead of two as instructed on the box of my paint (always follow the instructions of what you’re working with!).
I painted a first layer with a normal (synthetic) bristle brush, I squeezed the paint straight onto the brush and then tried to smooth it out as much as I could.
I opted for a first layer witha bristle brush to be able to reach all the nooks and crannies (hellow cheekbone area): if there’s an area that’s hard to reach just jam those bristle in it, something somehow will reach all the points you need.
Then I used the sponge brush for the second coat so that the finish was streak-free.
So, one coat, with bristle brush, wait five hours (or how much your box tells you), then second coat. Then, the day after I patted on some more paint only on those points that weren’t covered really well.
And done!
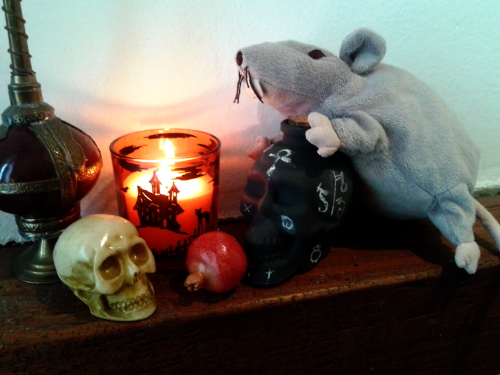
You can use it as is, or draw arcane sigils on it (don’t worry, I haven’t summoned anything)
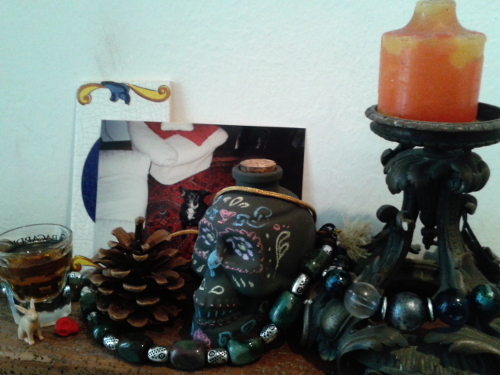
Or, if you celebrate “el dia de los muertos” (because you’re Mexican, because your grandpa was Mexican, because you want to gift this to a friend who celebrates it, or whatever) you can use coloured chalks and draw on it like it was some sort of sugar skull, put it together with the pictures and trinkets of your beloved ones (again, don’t worry, I wasn’t day drinking: it’s not a true offering of liquor, it’s just some tea, I needed something to take the picture!)
Sto postando questo articolo ovunque vedo post inneggianti alle presunte tradizioni italiote: che piacere sadico 😀
Non l’ho capita…
Quei post si facebook stile “io non festeggio halloween perché non è una tradizione italiana” et similia.
Ahn!
Beh, “halloween” per come si intende adesso (con caramelle, costumi, zucche eccetera) è una cosa piuttosto nuova e reimportata dagli USA… E come al solito per me ogni scusa è buona per divertirsi un po’.
Per il resto c’è pieno anche di post sulle “origini europee (e anche italiane, se cerchi) della festa di ognissanti-all hallows eve-halloween” 😉